Hello friends! Well now that Christmas is over it's time to get started on my 2024 card projects.
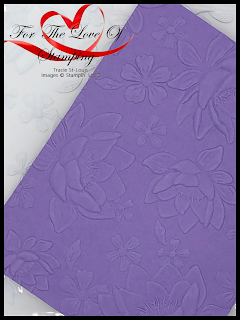
Starting Jan. 4, 2024, a new mini catalogue will be available. In it there are so many new products!Today I am featuring a few of them all on 1 card. One of my favourite items is the Layered Floral 3D embossing folder. This folder has so much depth to it. I wanted to show you up close how detailed it truly is. Check it out!
There are a few different ways you can use this 3D EF.
First, use it as is. It will make a beautiful backdrop for any card project.
Second, add ink to the folder before you run it through your embossing machine.
Three, add ink to the raised portions of the embossed paper like I have done on my project.So there is a lot going on with my card. I started with a Bubble Bath card base and added a layer of Highland Heather. I ran the white layer through my embossing machine and then used blending brushes to add the various colours (Bubble Bath, Fresh Freesia, Highland Heather, Parakeet Party & Granny Apple Green).I then blended the colors with a clear Wink of Stella to give each flower and leaf sparkle.
I die cut the purple glimmer paper (part of the Three Colour Glimmer paper pack) with the circles from the Everyday Detail dies.
Using the same technique of embossing and ink blending I used another new 3D embossing folder bundle for the sentiment - Thoughtful Moments Hybrid EF. This new product bundle features an 3D EF along with a die that allows your to create your sentiments (embossed) and die cut them at the same time. Once the sentiment was embossed and die cut I used a brayer (I can't remember the last time I used a brayer) to add the colour to the surface of the sentiment to make it pop.
Finally I embossed, ink blended and fussy cut one of the flowers from the Layered Floral 3D EF and added it along side of the sentiment & tied a tiny bow using Bubble Bath sheer ribbon.
I hope you enjoyed today's project. Stay tuned for more to come!
Happy stamping,
Hugs, Tracie


.png)

No comments:
Post a Comment